Author Topic: Please show me photos of your Dry Bag set up  (Read 13896 times)

Please show me photos of your Dry Bag set up
« on: 06 March, 2014, 11:17:55 am »
Reading into the whole luggage palava, I am currently tempted by a barbag + dry bag set up for longer stuff, with the dry bag being used for stuff I won't really be needing much unless stopping anyway (clothing etc).

However, I don't really know much about dry bags, what they are, or how they attach.  Pics and advice would be great ta :)
Does not play well with others


Re: Please show me photos of your Dry Bag set up
« Reply #2 on: 06 March, 2014, 12:12:23 pm »
I've got a couple of 8 litre Alpkit bags. I'm doing a light tour in May. I'll be strapping them to a rack either upright or side by side on the rack top inline with the rack. I'll take some photos once I've had a play. They're nicely made though.

Re: Please show me photos of your Dry Bag set up
« Reply #3 on: 06 March, 2014, 12:38:16 pm »
My set up is pretty basic. I use dry bags in conjunction with a Carradice SQR bag for overnight rides &  weekend camping


front bag (containing my hooped bivi) is strapped directly to the handlebars, and rear bag (sleeping bag) is bungied to the Carradice along with my sleeping mat and sandals  :)

Bags bought from Go Outdoors and Sports Direct, I think. They've been tested in lots of rain on the way to a YACF camping weekend, and have remained waterproof.
not so much a gravel grinder.... more of a gravel groveller


Re: Please show me photos of your Dry Bag set up
« Reply #4 on: 06 March, 2014, 01:11:29 pm »
Solo DIYs and days out.
We have proper luggage on the tandem.
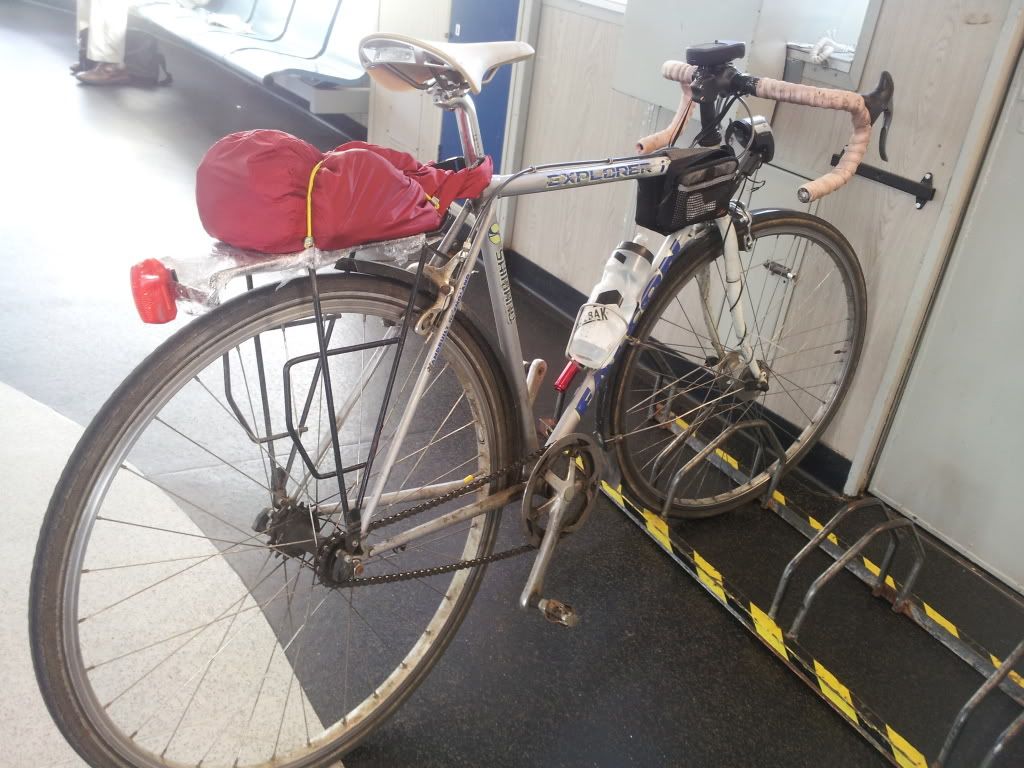
I take a kitchen sink to work, too, but if I'm leisure riding on my own, these days I have international rescue who would (probably) come and get me if it all went to shit. I'm mechanically inept, so don't take tools I can't use, for problems I can't fix. So basically, it's babybels, spare tube & levers, allen keys and a spanner for the rear wheel. Purse and jacket. Lippy. (That last one's a lie). Dry bag, bungee'd on wherever.
The bike weighs a ton, but the luggage is lightweight. Oct DIY200:

Lighter bike. (Gears :o). Summer.

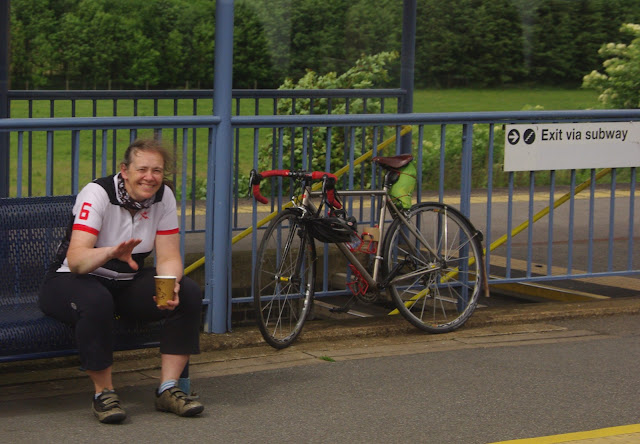
(Photo credit: Tim Hall)
Top Tip: Red drybags are better because in an emergency when your rear light falls off in a storm you can turn on your emergency teeny LED blinky in the red dry bag and voila! a replacement rear light.

Bar bags are another one on the (enormous) list of things I don't like. Mostly irrationally. They adversely affect handling, wheras the teeny weeny panniers across the top tube, don't.


tiermat

  • According to Jane, I'm a Unisex SpaceAdmin
Re: Please show me photos of your Dry Bag set up
« Reply #5 on: 06 March, 2014, 01:14:34 pm »
I have to disagree with you there, fboab, I like barbags.

Correctly installed and loaded (like any luggage) they don't adversely affect the handling and give you a great place to keep your hands out of chilly winds.  Especially useful if you have crossstop brake levers installed behind the barbag, too!
I feel like Captain Kirk, on a brand new planet every day, a little like King Kong on top of the Empire State

Re: Please show me photos of your Dry Bag set up
« Reply #6 on: 06 March, 2014, 01:17:18 pm »
Quote
Bar bags are another one on the (enormous) list of things I don't like. Mostly irrationally. They adversely affect handling, wheras the teeny weeny panniers across the top tube, don't.

Ah, those are the things I was looking at anyway.  Toptube panniers rather than barbag.  So that's good to hear they don't affect the handling.

Thanks for the pics.  I have a seatpost clamped rack which will hold a light load (picked up for a fiver at a bike jumble) so a dry bag would work brilliantly with that and will be a very cheap alternative to a Carradice+rack.  For the cost of those alpkit bags (thanks so much for all the links) it's got to be worth a try. 

The red bag + light - what a brilliant emergency solution!
Does not play well with others

Re: Please show me photos of your Dry Bag set up
« Reply #7 on: 06 March, 2014, 01:23:24 pm »
Especially useful if you have crossstop brake levers installed behind the barbag, too!

*shudder*


Phil W

Re: Please show me photos of your Dry Bag set up
« Reply #8 on: 06 March, 2014, 03:08:20 pm »
Tried bar bags last year, I too hated the way they affect handling. I mounted them on the bars, is that where I went wrong?

Re: Please show me photos of your Dry Bag set up
« Reply #9 on: 06 March, 2014, 03:19:35 pm »

Re: Please show me photos of your Dry Bag set up
« Reply #10 on: 06 March, 2014, 03:32:06 pm »

Phil W

Please show me photos of your Dry Bag set up
« Reply #11 on: 06 March, 2014, 03:35:02 pm »


This is a saddlebag but it's effectively a dry bag with modifications to add polycarbonate panels for support, plus quick release. Black is 15 litre and takes work laptop and other stuff, yellow is 9l and used for 400's upwards. The blue one is 4l and used for 200's and bumbling about.

They are heavier than a pure dry bag at around 500g including mounting hardware. But I love them , which it just as well as they replaced my Carradice.

Cudzoziemiec

  • Ride adventurously and stop for a brew.
Re: Please show me photos of your Dry Bag set up
« Reply #12 on: 06 March, 2014, 04:19:30 pm »
Those are the new ones that were launched recently on Kickstarter, aren't they? So are they actually waterproof? And doesn't that huge cantilever wobble a bit and make it awkward if you have to lift the bike up stairs, over gates and so on?
Riding a concrete path through the nebulous and chaotic future.

Vince

  • Can't climb; won't climb
Re: Please show me photos of your Dry Bag set up
« Reply #13 on: 06 March, 2014, 04:38:29 pm »
Bar bags are another one on the (enormous) list of things I don't like. Mostly irrationally. They adversely affect handling, wheras the teeny weeny panniers across the top tube, don't.

I just bought a bar bag to improve handling!
When I camped last year the handling was most unpleasant with all the weight over the back wheel.
216km from Marsh Gibbon

Phil W

Please show me photos of your Dry Bag set up
« Reply #14 on: 06 March, 2014, 04:45:44 pm »
Those are the new ones that were launched recently on Kickstarter, aren't they? So are they actually waterproof? And doesn't that huge cantilever wobble a bit and make it awkward if you have to lift the bike up stairs, over gates and so on?

Yep I was one of the Kickstarter backers. Cantilever projects just beyond rear of saddle. Not as huge as it looks. No movement at all. Bike will be heavier at rear but no real challenge there. Saddlebag is easily clear of legs so no rubbing. Been using on daily commute and audaxes all through winter,since I got them in October. Very definitely waterproof. Easy to open up to get stuff in and out on ride as well.

Re: Please show me photos of your Dry Bag set up
« Reply #15 on: 06 March, 2014, 10:31:54 pm »
I look the look of those, but they are awfully expensive for what they are.

Re: Please show me photos of your Dry Bag set up
« Reply #16 on: 06 March, 2014, 10:52:10 pm »
I look the look of those, but they are awfully expensive for what they are.

I`d agree look very interesting and good weight savings (over half kg v `conventional` bags etc?) but i suppose price wise when compare to eg a saddlebag + support which will be near £100 they`re not too excessively priced. What i`d like know though is how accessible are contenst during riding ? With `normal` saddlebag very easy access side pockets / main compartment but how do roll tops compare? Are they pack and forget until end of day or more easy to access during ride?
....after the `tarte de pommes`, and  fortified by a couple of shots of limoncellos,  I flew up the Col de Bavella whilst thunderstorms rolled around the peaks above

Phil W

Re: Please show me photos of your Dry Bag set up
« Reply #17 on: 08 March, 2014, 10:24:14 pm »
Nope really easy to loosen straps get stuff in and out, and then tighten straps again. Quicker than my old Carradice pockets with their buckles.

woollypigs

  • Mr Peli
    • woollypigs
Re: Please show me photos of your Dry Bag set up
« Reply #18 on: 08 March, 2014, 11:10:15 pm »
Ortlieb bar bag surivied serious sand storm, heavy rain for days on end - nothing happened to camera and passport within.

Ortlieb panniers works for me, faffing around with straps etc with a dry bag is too much. Though great for keeping wet smelly stuff away from dry stuff - ours from Alpkit, top kit.

We both had our down sleeping bag, merino "PJs" pillows in our painners for nearly a year and never had any off it wet no matter how hard it came down.

We found a ortlieb dry bag with a hole in, bit of gaffa tape fixed that, and now out tent lives in that. Great protection for the tent not so easy to rip, compare to the normal tent bags.
Current mood: AARRRGGGGHHHHH !!! #bollockstobrexit

Kim

  • Timelord
    • Fediverse
Re: Please show me photos of your Dry Bag set up
« Reply #19 on: 09 March, 2014, 12:41:04 am »
If we're getting into the heavy touring set-up then I'm a big fan of Alpkit dry bags (or just their water-resistant stuff sacks) for sorting items that are going to be packed into panneirs.  They add negligible weight, allow you to keep wet and dry kit seperate in the same pannier, and make for a quick and easy transfer between tent and panniers (which means you don't have to bring a wet/muddy pannier into a small dry tent, or get all your stuff wet transferring it).

A similar approach can be used for audax/day rides, where you keep the contents of your luggage in a dry bag or two, and simply whip them out to carry with you when you stop.

Re: Please show me photos of your Dry Bag set up
« Reply #20 on: 10 March, 2014, 08:39:05 pm »
Nope really easy to loosen straps get stuff in and out, and then tighten straps again. Quicker than my old Carradice pockets with their buckles.

I just like the trad look of Carradice, and can put up with the buckles however the convenience of that mounting has been nagging away at me, and so my Barley had just undergone the appropriate modifications to try it out.  The cantilever mount, the adapter plate and some internal stiffening still weighs significantly less than a Bagman.

Phil W

Re: Please show me photos of your Dry Bag set up
« Reply #21 on: 10 March, 2014, 08:49:18 pm »

Nope really easy to loosen straps get stuff in and out, and then tighten straps again. Quicker than my old Carradice pockets with their buckles.

I just like the trad look of Carradice, and can put up with the buckles however the convenience of that mounting has been nagging away at me, and so my Barley had just undergone the appropriate modifications to try it out.  The cantilever mount, the adapter plate and some internal stiffening still weighs significantly less than a Bagman.

Piccies Pete, piccies :-)

Re: Please show me photos of your Dry Bag set up
« Reply #22 on: 11 March, 2014, 09:55:10 am »

Nope really easy to loosen straps get stuff in and out, and then tighten straps again. Quicker than my old Carradice pockets with their buckles.

I just like the trad look of Carradice, and can put up with the buckles however the convenience of that mounting has been nagging away at me, and so my Barley had just undergone the appropriate modifications to try it out.  The cantilever mount, the adapter plate and some internal stiffening still weighs significantly less than a Bagman.

Piccies Pete, piccies :-)

Not until I've tested it on a ride.

interzen

  • Venture Altruist
  • Agent Orange
    • interzen.homeunix.org
Re: Please show me photos of your Dry Bag set up
« Reply #23 on: 11 March, 2014, 11:52:40 am »
Reading into the whole luggage palava, I am currently tempted by a barbag + dry bag set up for longer stuff, with the dry bag being used for stuff I won't really be needing much unless stopping anyway (clothing etc).

However, I don't really know much about dry bags, what they are, or how they attach.  Pics and advice would be great ta :)


This is the setup I plan to use on the Tour Divide (a mere 2,745 miles ...) either this year or next - it can hold everything I need for a 24-25 day jaunt down the spine of the Rocky Mountains.

Luggage is, in no particular order:

  • Revelate Designs Viscacha seatpack
  • Revelate handlebar harness and dry bag, with large-size Revelate 'Pocket' (for holding maps, passport, documents etc.)
  • Alpkit top-tube and frame bag (The frame bag is custom made, although I believe that Alpkit are doing 'stock' sizes now)
  • Revelate Jerrycan (betwixt top-tube and seatpost)

The rack is a Tortec Ultralite, but it's only there so I can use it as either a seatpack support or as a means of  carrying a 4 litre water bladder in the dryer areas (eg. the Great Basin in Wyoming and most of New Mexico)

For most practical purposes, I can get away with just the seatpack for most overnighters - anything longer and I'll strap a drybag under the tri-bars (or use the Harness plus drybag - it just makes removing the dry-bag easier as it straps in)

Alpkit do cheaper alternatives to Revelate Designs bags, if you can find them in stock that is.

Re: Please show me photos of your Dry Bag set up
« Reply #24 on: 12 March, 2014, 03:30:22 pm »
Piccies Pete, piccies :-)
Not until I've tested it on a ride.

Nothing untoward to report so here you go:


The bracket is this one: http://www.amazon.co.uk/Rixen-Kaul-Extender-Bicycle-Handlebar/dp/B000OZDKGC/ref=sr_1_28?ie=UTF8&qid=1394637768&sr=8-28&keywords=rixen+kaul+klickfix
And the adapter plate: http://www.amazon.co.uk/Rixen-Kaul-Fixing-Basket-Klickfix/dp/B001CCNCUU/ref=sr_1_42?ie=UTF8&qid=1394637867&sr=8-42&keywords=rixen+kaul+klickfix
For internal stiffening (at least on the prototype) I used the side and base cut from an empty one of these:
  
It's not quite wide enough, but adequate for lighter loads.
I'm doing a heavy-duty version next for my old and rather tatty Pendle.