.... What tools are needed if I have to go that far? And do you need different ones for each Shimano freehub ever made?
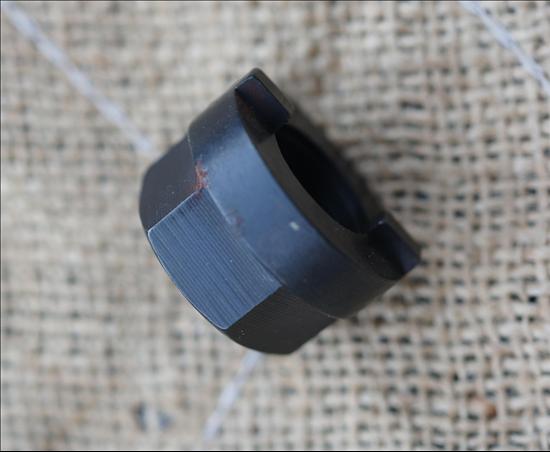
Tool-wise you need something to get the seal out of the RH end of the freehub body and then a special tool to unscrew the RH hub ballrace, which is on a LH thread.
The correct tool/method for the dustcap will vary with the type and whether you intend to re-use the seal or not.
Shimano used to make a special tool TL-FH20
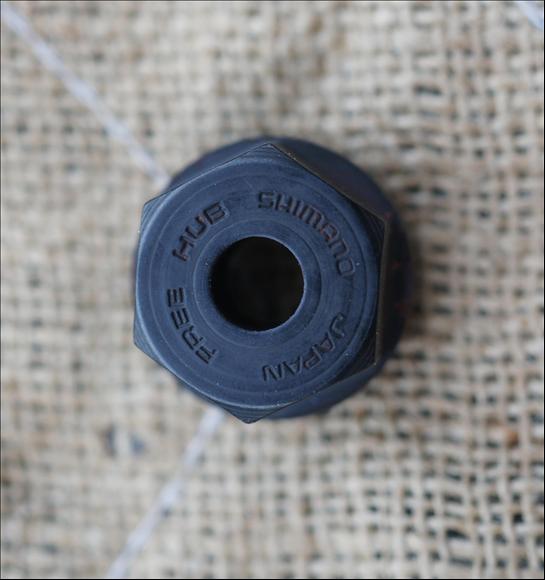
for this purpose. There are a few other tools of similar type which have been made by others too. Commonly folk improvise by grinding a socket to fit.
This sort of tool will fit every shimano freehub body. However a few of them have four slots and a reputation for cracking, so if that is the sort you have, making a (well made, accurate) four-prong tool might be the best thing to do.
The two-prong tool also fits most off-brand shimano compatible freehubs too.
Bolting through the centre is a very good idea, else the prongs tend to slip out. I built a special tool which features replaceable dogs and a built-in through-bolt. It also serves as a workstand for the hub, and (usually) prevents the loss of stray 1/8" balls which have an irritating tendency to disappear into the hubshell otherwise...
Inside the workings are much like any freewheel. When disassembling, it is best to pick out the top layer of balls using a magnetic screwdriver. The lower balls are best captured by inverting the whole affair over a bowl of some kind.
If you remove the pawls, it isn't a bad idea to return them to their original positions, since they wear in use and won't share the load so well if they are swapped in position.
When reassembling, the lower set of balls need to be stuck in place (on the inner part of the assy) using some #2 grease. The upper balls can go in loose aftgrewards; provided the base shim is undisturbed, the upper balls can't go anywhere. However if the base shim is disturbed, there is a chance that one or more upper balls will drop down into the unoccupied 'third slot' in the body. Leaving a ball in there 'would be a very bad thing' so if in doubt, check.
To simply reshim a freehub, you need to be able to lift shims off the stack without disturbing the base shim or losing any of the balls. I have found that the best way of lifting shims is to use two small jewellers screwdrivers or special paddle tools that are made from flattened spokes. The adjusting shims (unlike the thicker base shim) are slack on the diameter, so can usually be nudged sideways one at a time before they are lifted. Often two come away at once or one comes away with the ballrace as it is unscrewed, so they can get away from you if you are not careful.
The base shim is often indented where it bears against the slotted body. This can mean that if it is moved to a different position, the apparent bearing adjustment isn't 'true' until the ballrace is fully retightened, and the indentations are squashed flat/remade as necessary. In any event when checking the adjustment the ballrace needs to be well down; 20ftlbs or so, vs a bit more when the adjustment is finished. If you leave the ballrace loose or not down on the shim stack, it will precess in service and this would be 'another bad thing'.
Shims from off-brand freehub bodies look the same but are often different to shimano ones, and (IIRC) won't fit over the centre part of a shimano body. If you try to use shimano shims in an off-brand freehub, they are slack enough on the diameter that they can foul the balls in the upper ballrace if they go off-centre.
Shims go from ~0.05mm upwards. Because they don't always overlap perfectly when stacked, they get little burrs and creases at the edges which makes them difficult to measure accurately; using a micrometer it is usual to have to use a little more force than normal to get a reasonably accurate reading. In practice you can feel how flexible they are and use this as a rough proxy for thickness. When you flex them this is when you find if you have two stuck together or not....
0.05mm shims don't appear in every freehub body and anyway don't give perfect adjustment. A freehub that is 0.1mm wrong on the shim stack is really quite slack and one that is 0.05mm out is noticeably loose. If you rob shims from old freehub bodies you will find that some of the thicker ones are odd measurements so that in theory you can get to with 0.03mm of 'perfect', if you have the right shims. You can of course make shims from beer can etc too but if you use an alu shim it is best to have it in the middle of the stack because it might get torn up if it is left at the top.
To get 'perfect adjustment' it is possible to lap the mating face of the ballrace; it takes a few minutes using 400 grit paper to remove about 5-10 microns (0.005-0.01mm) so it can be tedious work. I often use a special flat grinding wheel for lapping, which is much faster, but somewhat more risky.
If you grind or lap, it is important to clean the part thoroughly before each trial fitting, else you could well get bits of carborundum in the workings.
I've done hundreds of these blessed things by now; often I can do it quite quickly because I know roughly what a modest wobble means in shim terms, and I have lots of spare shims now (a stack about 1" high....

). So I often pull the top two or three shims out, measure the stack, take the top shim out or build a shorter stack and try it. Occasionally it comes right first time.
Then there are the other times, when it turns out that you need to replace the base shim (because it is too thick) and the shims are all a funny size and you don't have the right ones... so if it all goes well it might take about twenty minutes (including sorting the hub bearings out) but if it goes the other way then it might be an hour. If you are doing it for the first time it could easily take two or three times longer, plus any delays to get the required tools and shims together.
It isn't actually very difficult or anything but there are a few possible pitfalls which I have outlined above.
hth
cheers

