Tried the new camera out on the newly driven mount last night going interstellar.
The back story is that I bought a drive kit for the Skywatcher EQ3/2 mount I got with my scope along with a polar alignment scope. Polar alignment (aligning the Right Ascension axis of the scope with the polar axis of Earth) is essential for trail free long exposures. To achieve this, you utilise a polar alignment scope which sits in the axis of the mount. The scope has a reticle which is lined up with Polaris depending on the year etc. Before attemting anything you have to ensure that the polar scope is accurately aligned to the axis of the mount.
Aligning a polar scope to a mount can be akin to herding cats. Idealy done at night and using Polaris as your target you set up and level the mount, with the elevation of the mount consistent with the lattitude of your location (51 and a tad degrees for me) and ensure that the mount is correctly orientated re North. You then put the centre of the reticle on your target and rotate them mount around the RA axis 90 degrees (either way) or 180 degrees depending on your favourite tame experts advice. Look through the polar scope and note the distance and direction that the target has wandered from the reticle centre. Now make adjustments to the 3 grub screws in the polar scope (1.5mm allan key required on my scope) to shift the reticle half way back towards the target. Then using the mount fine adjustment screws, recentre the reticle on the target. Rotate back to start point and repeat until the target stays in the centre at both points. Alignment has been achieved. Bearing in mind that Polaris is quite high in the sky (find the Big Dipper- the two stars that form the 'wall' of the bowl furthes trom the handle form guide stars, a line drawn through these two stars, from bottom of bowl to top, extending about twice the distance between the two stars points almost exactly at Polaris), looking through the polar scope every minute or two for the eons it seems to take is neck breaking. Add in the fact that my polar scope isn't illuminated so red torch use at the objective end was required AND the buggeration factor of very small, dairy product related grub screws at night meant that I was about ready to kill someone by the time I had finish. 3 attempts it took

Cat herding? pice of cake compared to that.
Once you have the polar scope aligned you are ready to go. When setting up, you have to do your polar alignment. Not as awkward as polar scope alignment but still a bit of a faff. Deploy mount, level mount and ensure it is North aligned. Grovel on knees and check position of Polaris in relation to polar scope reticle. Adjust and repeat until aligned.
Next you mount your scope to the tripod and then notice that the cloud has crept in and covered your intended target

Retire to the domicile and watch an episode of The West Wing and sup an hot coffee.
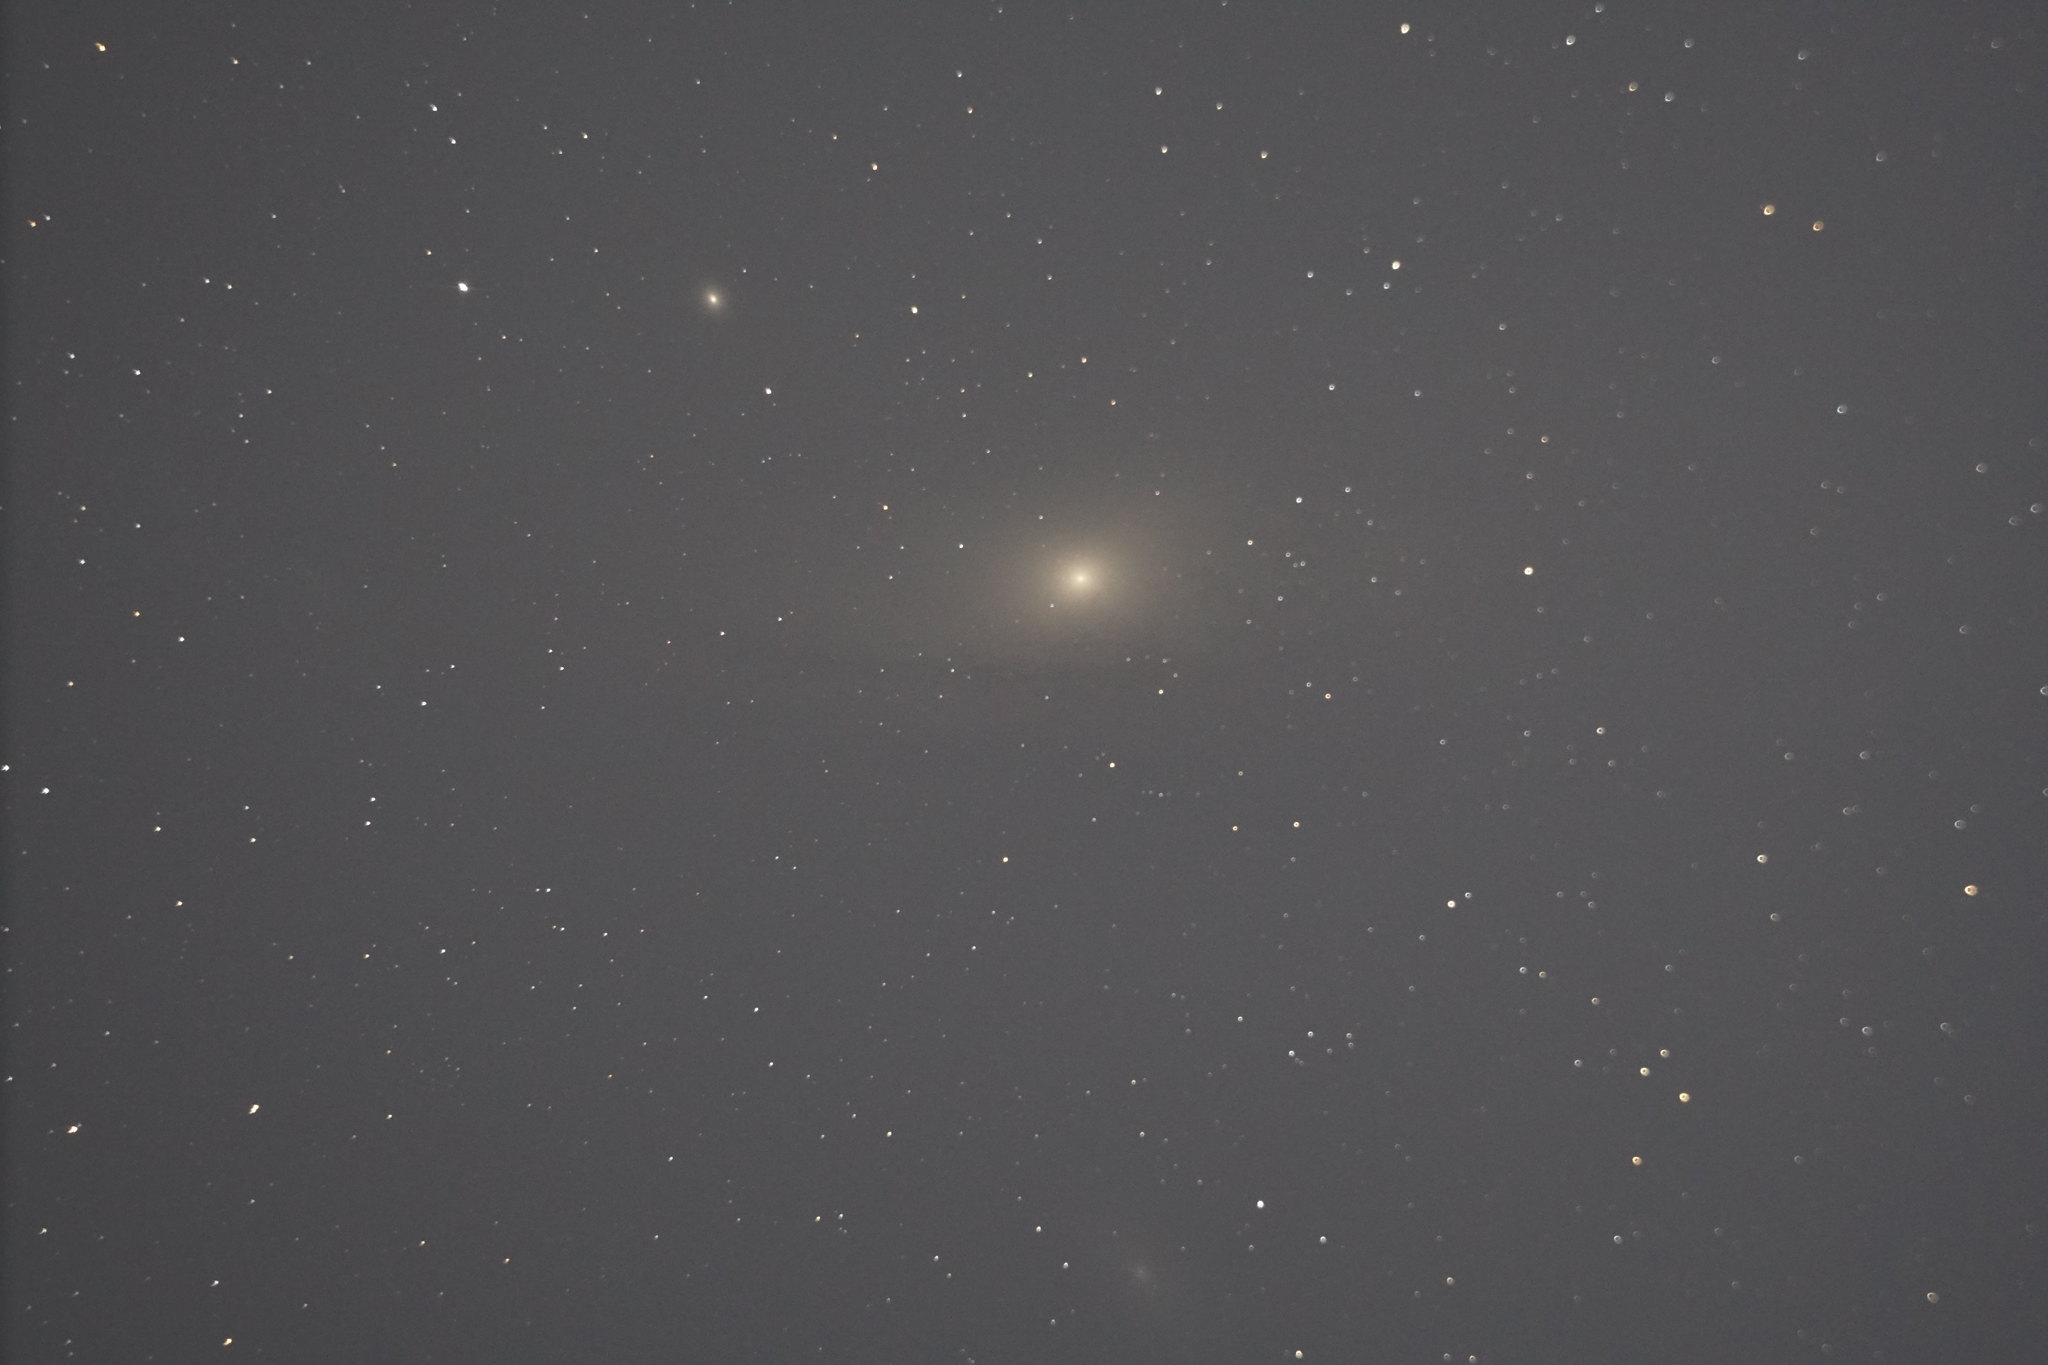
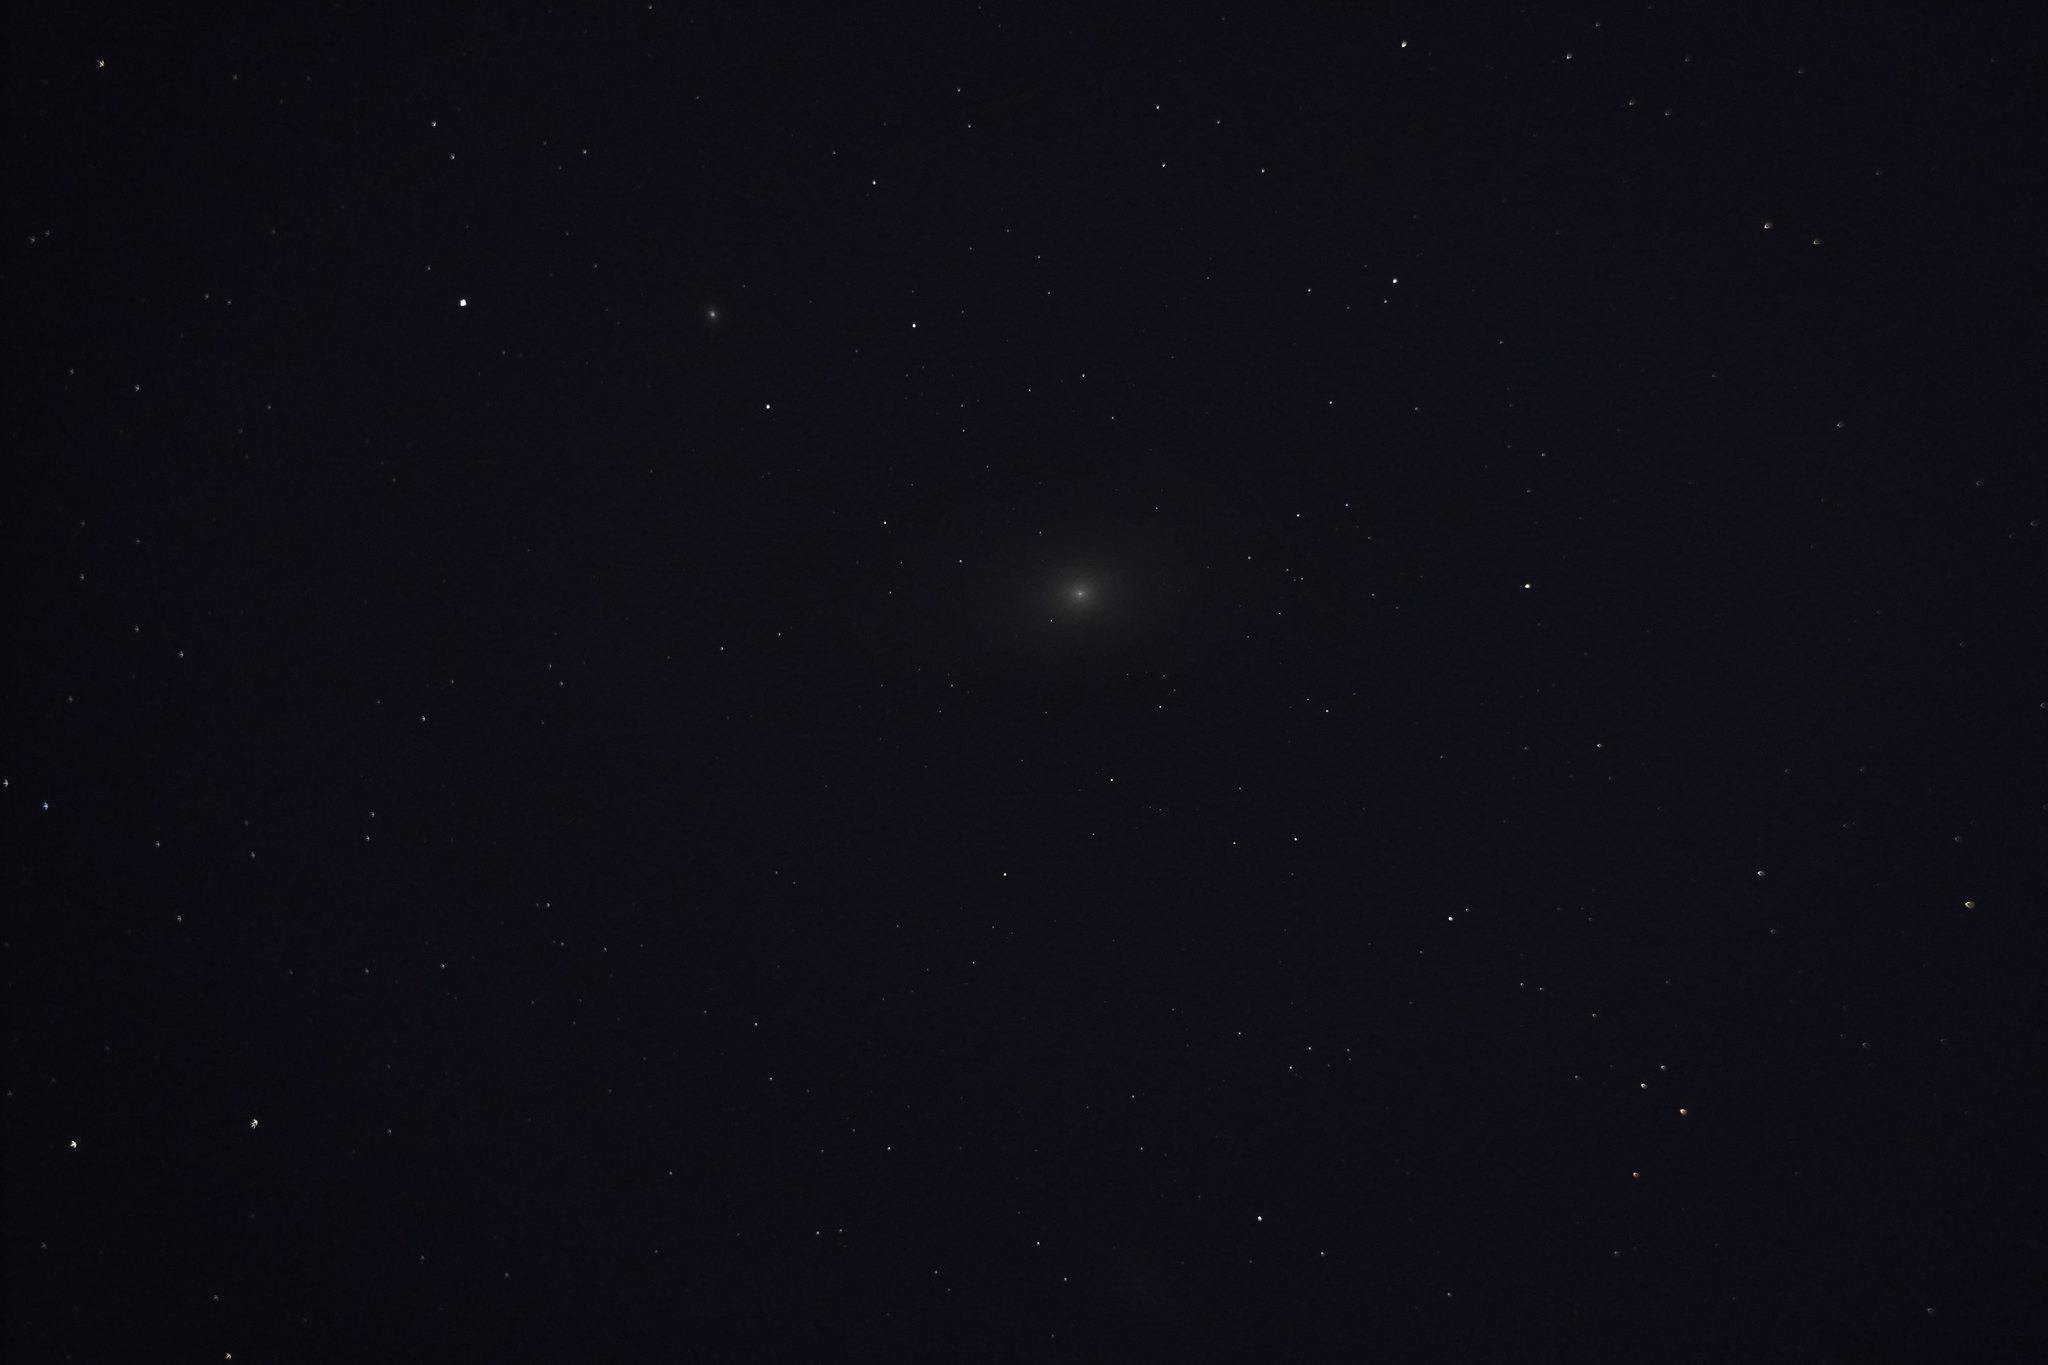
The cloud did eventually clear so out I went and set the camera and iPad up. My first target was M31 The Andromeda Galaxy-
 DSC00176
 by
Matt Langridge, on Flickr
ISO1600 single frme 30 seconds
 DSC00179
 by
Matt Langridge, on Flickr
ISO1600 single frame 15 seconds
M31 is the nearest galaxy to ours and is about 2.5 million light years away (thiugh it is getting closer).
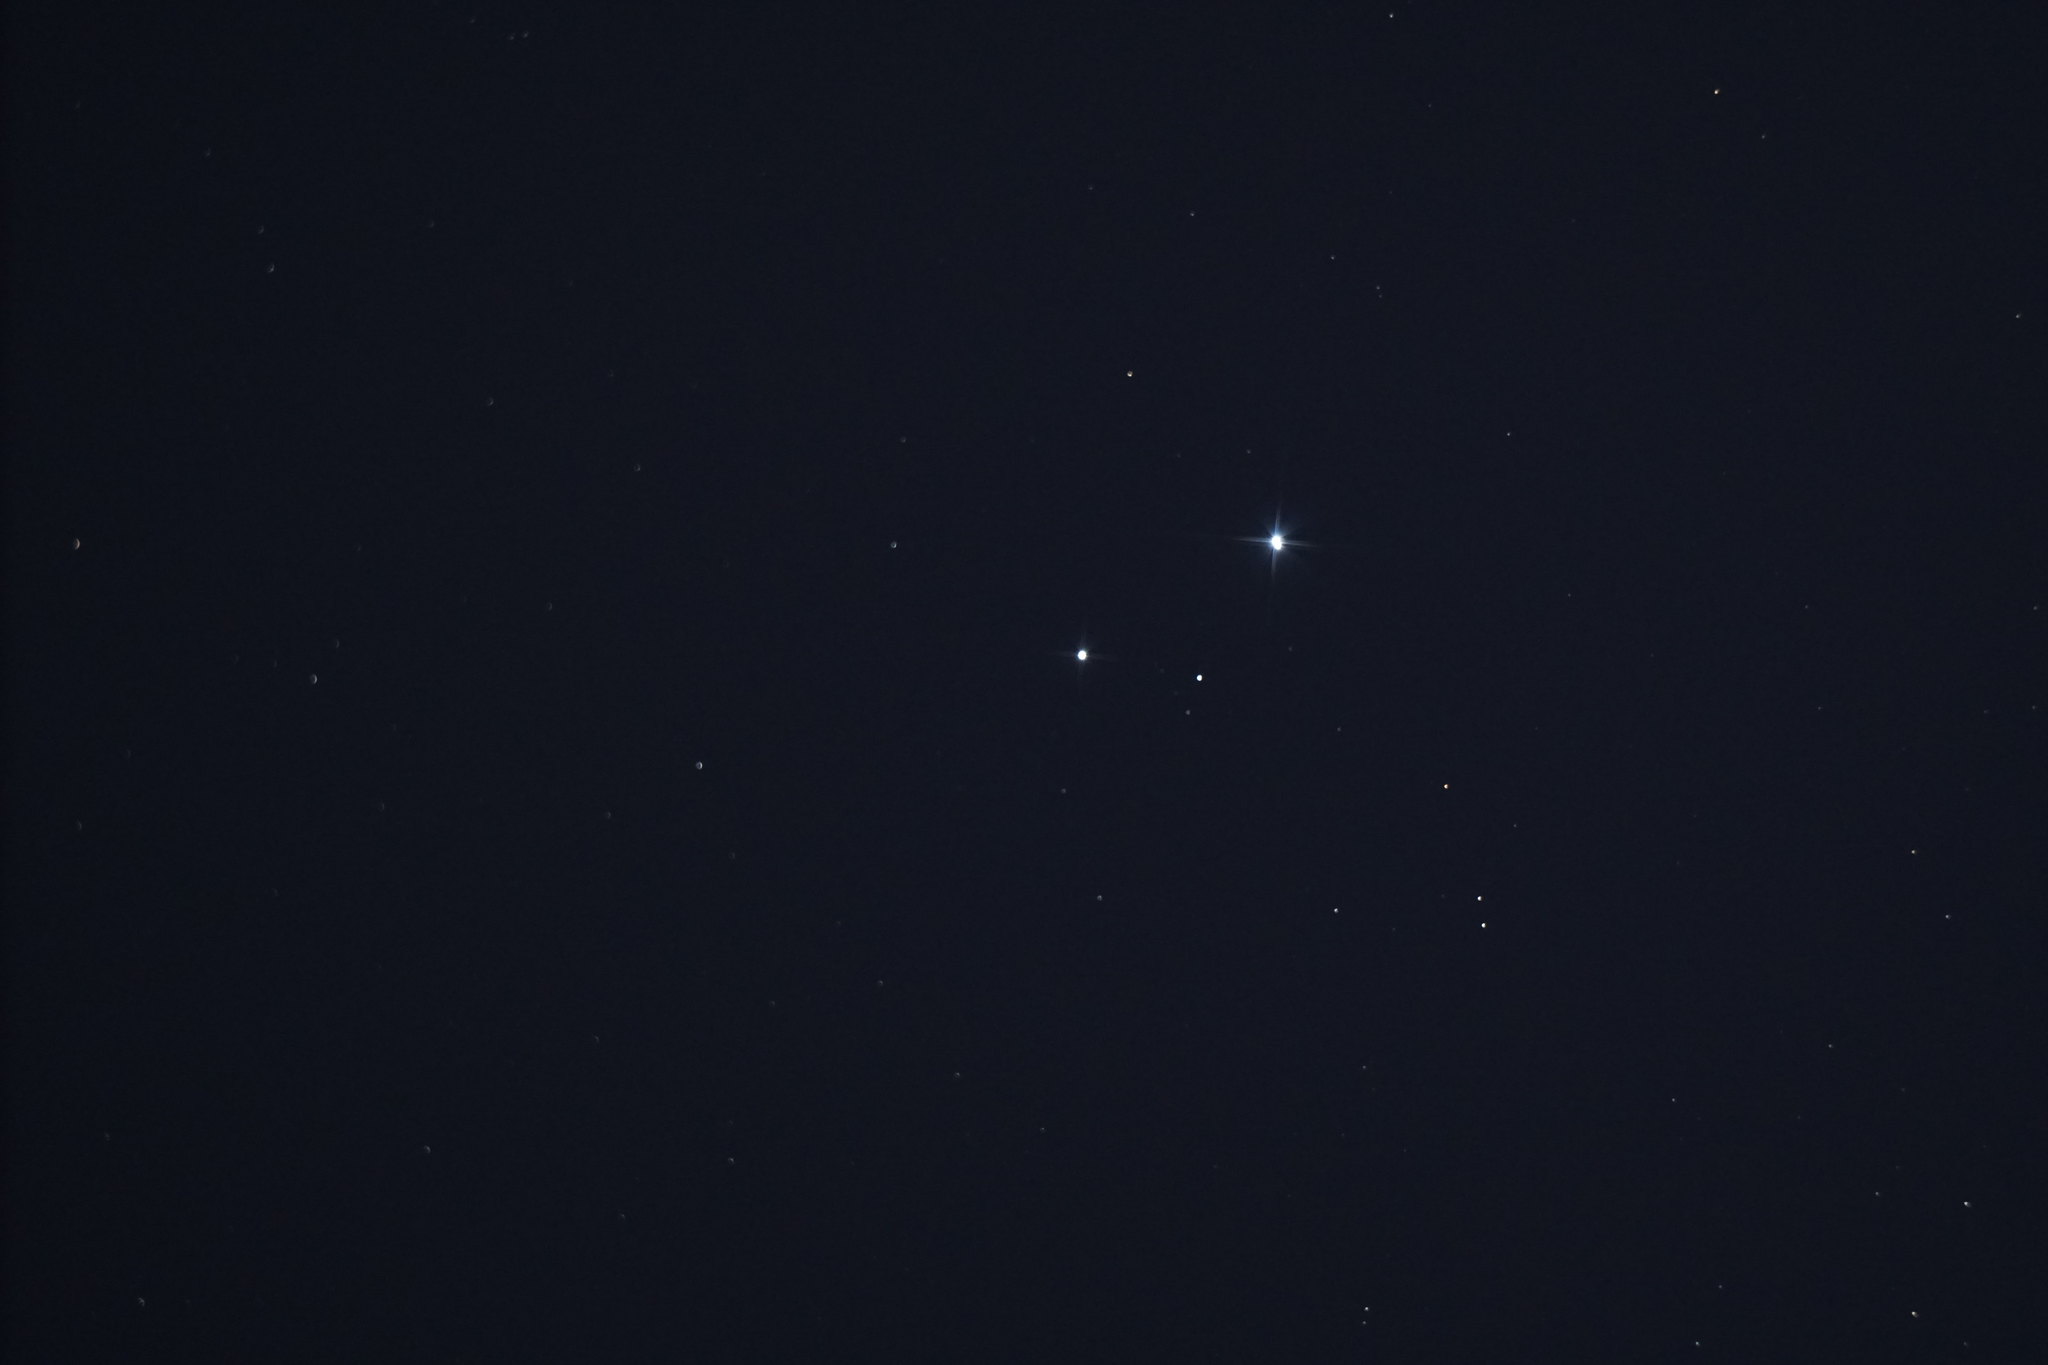
I next had a look at Mizar. Mizar is the centre star in the handle of The Big Dipper. The reason I went there is because it is a double star in that it has a companion star (Alcore). Some folk can split the two with the naked eye. Mine are shot enough that I need binoculars to do so. Mizar is about 88 light years away.
 DSC00182
 by
Matt Langridge, on Flickr
ISO1600 single frame 5 second exposure.
Mizar is the brighter star, Alcore the slightly fainter.
Last nights images suggest my scope alignment isn't perfect as some trailing is evident though not too bad. As I get used to the basic operating methods I will progress on to multi frame capture and stacking.

